The post How To Accept Payment On Facebook (All Methods) appeared first on Sorting Tech.
]]>Facebook also provides a payment method, a currency of its own called Facebook Stars to make the payments or donations to live streamers.
If you run your business through the Facebook marketplace or provide any service for which you need to accept payments.
So, accepting payments through Facebook is simple, you just need to follow any of the following methods.
After owning WhatsApp, Facebook has reached to larger groups of people around the globe.
There are a high number of chances, that every people who own a smartphone and has internet connectivity uses either all or one of the Facebook products (Instagram and WhatsApp).
Like it or not, there’s no getting away from Facebook.
So, without many other discussions just begin with the methods for accepting payments on Facebook.
You can either use third-party services like PayPal and FundRazr to accept payments through Facebook, or you can use Facebook Messenger to receive payments.
Yes, That’s right, with Facebook Messenger, you can easily accept payments.
However, this feature is not yet launched for many countries, the US and UK are few in which you can use Facebook Messenger to receive payments.
So, at first, I am going to give you a method for a third-party application, as Facebook Messenger is not available for most countries.
How To Accept Payments On Facebook Using PayPal
You can add a PayPal button link on your page, to receive payments, to do this use the following methods.

- Visit www.paypal.com/webaccept
- Login in to your Paypal Account.
- Fill all the details as per the above image and click on Create Button.
- On the next page, click on the Email tab and then Select and Copy the code.
- Now, log in to Facebook and open your page.
- Click on Create Post and then add your text for example, ‘Best Statues’ and paste the code below it and hit on Post.
With this, you can accept payment directly into your PayPal.
Also, you can also receive money by raising find, this could be for anything like any social cause or national calamities.
Accepting Payments On Facebook With FundRazr
FundRazr is a free crowdfunding and online fundraising platform first released in 2009.
FundRazr operates internationally in 35+ counties with the largest markets being the United States, Canada, United Kingdom, and Australia.
With this, you can receive payments from various users in one go, and you can link your PayPal account in it too.
- Go to www.FundRazr.com
- Click Login on the top right-hand corner of the screen.
- Click Continue with Facebook under Login to FundRazr.

- Choose your option from the drop-down, as shown in the image above.
- Now Fill the following details, as per your agenda.

- On the next page, add any picture you want for your campaign and story attached to it, and click on Save&Continue.
- On the next page, add details like Location, Currency, Funding type, Goal, and Deadline, and then click Save&Continue.


- Now, give some more details as in the below image.

- After all of this Review your information and then Launch the campaign.
This campaign then will be launched on your Facebook profile, and as per your selection will be visible to your friends and all.
This is another method for raising money from Facebook.
Now, the last method, which you can use to accept payments on Facebook, and for this, you need not do much, as compared to former methods.
How To Accept Facebook Payment Using Facebook Messenger
Messenger is a convenient and secure way to send and receive money, and it is highly convenient too.
The Messenger payments system is simple to figure out.
In a chat with a friend or any other person(from whoever you are receiving the money), press the blue + icon, and select the payment option.
On the first payment, you will need to enter your bank information (Visa and Mastercard) and the amount to be paid or users can choose PayPal as the source when making a payment.
The money is then transferred in up to three business days.
PayPal did not say whether it plans on bringing peer-to-peer payments to other messaging platforms too, but this news, as PayPal COO Bill Ready puts it, is part of a “broader movement where we’re meeting the user in whatever context they’re in.”
To receive the payments, do the following:
- Open the conversation.
- Tap Add Card or PayPal.
- Add your debit card and set up your account to accept money for the first time.
The maximum transfer amount is $9999, and also there is no fees to send the amount ie., sender needs not to pay any extra charge.
Facebook claims that it encrypts personal data and credit card numbers of the users, so you need not worry.
It also takes care to store your financial information separately from your account data, which means your public profile of Facebook is not stored with the payment information.
However, as with any transaction where the money is involved, you should take steps to protect yourself from fraud and other problems. So, use it with the verified users only.
You can’t cancel Messenger payments, although recipients can voluntarily reject them if you make a mistake.
Facebook does not advertise any type of consumer protection, and you are not supposed to use Messenger for business payments.
So, make sure of that always.
Conclusion:-
I hope you have found this article How To Accept Payment On Facebook, useful. So, you can use them right away without any hesitation.
You May Also Like:
If you face any problem in receiving payments, just let me know in the comment section below.
Also, do share your suggestions and methods I missed in the comment section.
If you like this article, do share this with your friends and family too.

Zayn Shaikh is a tech analyst at SortingTech.com, where he focuses on streaming, technology, and the latest methods and tricks for cord-cutting. With a Bachelor’s degree in Computer Engineering and 4 years of industry experience, Zayn is dedicated to simplifying complex tech trends and providing actionable insights. His expertise covers a broad range of topics, from emerging technologies to practical tips for enhancing your digital life. For up-to-date tech advice and facts, connect with Zayn on Instagram.
The post How To Accept Payment On Facebook (All Methods) appeared first on Sorting Tech.
]]>The post How To Delete A Video From Vimeo Easily [Android, PC Or Mac] appeared first on Sorting Tech.
]]>As compared with YouTube which is a free platform, Vimeo is not that popular among everyone, but for bloggers or vloggers, it is quite a platform, because here you will only get good and original content.
Vimeo is a video hosting, sharing, and services platform which has some of its own guidelines that you need to follow if you want to use this platform.
You should look at the community guidelines first, before going for it.
There is also one option to “Replace This Video” if you do not wish to delete the video, which is also mentioned in this article, and if you are not okay with it, then go ahead for the deletion.
There are many features you will get on Vimeo as per the plan you have opted for. But, if you only wish to watch videos on Vimeo you do not need to register.
You will get 30 days of free trial on Vimeo for all the paid plans or you can just continue with Vimeo Basic, in which you will get 500 MB per week of storage(up to 5 GB total), ability to upload up to 10 videos per day and the ability to create 1 channel, 1 group, and 3 showcases.
For more upgraded plans of Vimeo, please click here.
If you won’t like its features and services, you can Cancel Vimeo, easily.
How To Replace Video On Vimeo
You can replace your older version of the video with a new version, and a good thing is Vimeo keeps a record of the details of the previous versions also.
Upload time, file size, URL, and review page notes of each version of the video will be available as version history in Vimeo.
To replace the video, follow the below steps.
- Log in to Vimeo and head to Your Videos section.
- Click on the settings icon, over the video you want to replace.
- Now, go to the video file tab in video settings.
- Now, click on “Replace this Video“, to add a new version of the video.
On any video’s review page, you’ll now see a version menu. From there, you can review every previous change of your video, including all of the time-coded notes for each version of the video.
ATTENTION ALL!!!
Do You Know these facts about the potential dangers of streaming online : 1. The risk of your IP revelation. 2. Your ISP has all your browsing data and it is now legal to sell this type of information to third parties. The only way to protect your viewing and identity in the 3 above scenarios is by using a VPN. Check out these most popular VPNs that will help you with this:- a) Express VPN b) Ivacy VPN
This is a great way to self track changes to your video while showing any external reviewers only the most current version of the video.
So, this will let you change the video, without deleting it. But, if you only looking forward to deleting the video, then just move ahead for the next headings.
You can delete the video either directly from your Mac/PC or from the mobile application too, here you will find both methods. Select any as per your ease.
Delete Vimeo Video On Android
- Open the Vimeo application on your android device.
- Tap on the smiley face icon.
- Tap on the vertical three dots option on the video you want to delete.
- Now, tap on Edit Video Settings.
- Scroll down a bit and tap on Delete Video(red option).
- Confirm the deletion by tapping on Delete.
Delete Vimeo Video On PC/Mac
- Open your web browser and visit Vimeo and click on My Videos.
- Now, click on the mechanical gear icon on the video which you want to delete.
- Then, click on the Video File and after that Delete this Video(red button).
- It will ask for your Vimeo password, enter it, and at last click on Delete.
That’s it, the video you wanted to delete is gone now.
Conclusion:-
I hope this article of How To Delete A Video From Vimeo, was useful for you and now you will be able to delete the video or replace it. Please let me know in the comment section below if you face any issues.
Must Read:-
Also, share this article as much as you can and help others too.
If you have any suggestions regarding this article, please mention them in the comment section below.
Zayn Shaikh is a tech analyst at SortingTech.com, where he focuses on streaming, technology, and the latest methods and tricks for cord-cutting. With a Bachelor’s degree in Computer Engineering and 4 years of industry experience, Zayn is dedicated to simplifying complex tech trends and providing actionable insights. His expertise covers a broad range of topics, from emerging technologies to practical tips for enhancing your digital life. For up-to-date tech advice and facts, connect with Zayn on Instagram.
The post How To Delete A Video From Vimeo Easily [Android, PC Or Mac] appeared first on Sorting Tech.
]]>The post How To Record Shows On Philo TV (Recent And Upcoming) appeared first on Sorting Tech.
]]>Subscription of Philo is very economical, as you can use the same account on three different devices at the same time, so you can also share the subscription amount with your friends and family too.
Philo tv is compatible with devices like Apple TV, Amazon Fire TV, Chromecast, Roku, Android TV, iOS, and Other android devices, or on any web browser of your computer, you just simply need a fast and reliable internet connection.
More On Philo TV:
One more thing, if you are streaming Philo on different devices at the same time(3 devices at a time), you must be connected with different networks or should opt for fast internet speed, around 50-60 Megabit per second.
Also, you can create up to 10 profiles on it.
Otherwise, for a single screen 5 to 10Mbit/sec will do the job.
This much speed prevents interruptions while streaming.
This recording feature comes with the base price of Philo and requires no other additional fee.
Philo has native DVR ability, which helps and lets you record so many shows, to watch them later.
After recording, Philo lets you save your show for 30 days only, which I think is the drawback. But, with this price, it is a good option.
This recording feature works with devices like Firestick, Roku, Apple TV, etc. so you need not worry about How To Record Shows On Philo TV on firestick, etc.
How To Record On Philo
Philo offers 20 hours of DVR space to its subscribers, which is quite appreciable. As, when binge-watching you need not depend on the internet speed at that particular period of time.
You can simply record the season in one go, and then watch it whenever you want it(within 30 days).
But, you need to be a regular subscriber of Philo then.
This guide is a generalized one, as Philo TV works the same on all the streaming devices, there is no need to individually explain different devices. Use the following methods they will surely work.
Step-1) You first need to login to your Philo account and reach out for the GUIDE option and click on it.
Step-2) Search for the show you want to record on your Philo account and click on it.
Step-3) Now just by simply clicking on the plus(+) sign you can start the recording, and stop the recording again click on the plus(+) sign.
Just like that.
You have recorded your favorite show for later, you can do this for the multiple shows you like to watch later on.
And, if you like sports and stream sports more often on your TV, check out ESPN Plus and also how to cancel an ESPN+ subscription, if you don’t like it.
Similarly, there are more services like Fubo TV and DAZN which also provide sports content.
Philo TV lets you watch the recorded shows with your choice, you can watch recorded shows many times or in parts too, all of this and without a single ad.
Now that you have recorded the show, keep in mind that you only have 30 days to watch it, after this recorded show will be gone automatically and you have to save it again or stream it.
I think 30 days are too much to finish any individual show.
ATTENTION ALL!!!
Do You Know these facts about the potential dangers of streaming online : 1. The risk of your IP revelation. 2. Your ISP has all your browsing data and it is now legal to sell this type of information to third parties. The only way to protect your viewing and identity in the 3 above scenarios is by using a VPN. Check out these most popular VPNs that will help you with this:- a) Express VPN b) Ivacy VPN
Now there is one thing more on Philo that you will definitely like, which is, you can also record upcoming future shows on Philo too. Keep on reading for the methods.
How To Record Upcoming(Future) Shows On Philo TV
This Philo is quite smart, so you can use its recording for the upcoming future shows, it will record automatically.
With this feature, you can record not only the upcoming new shows on Philo but also the upcoming reruns of some old shows of your like and can watch them in the next 30 days.
Follow the following methods to get this done.
Step-1) Simply login first into your Philo TV account on any of your preferred devices.
Step-2) Search for the shows, be it the upcoming new one or the upcoming reruns of any old show. In two weeks’ advance, you can see the schedule of the upcoming show.
Step-3) There will be two options Record New and Record All. Select as per your choice. With Record New, you can record every upcoming future shows on Philo, and Record All will record all upcoming reruns.
That’s it, your show is now recording mode, you will be able to see the red record sign on the show.
Now when the episodes of the show will be aired it will get automatically recorded and you can watch them in the next 30 days. As this process of automatic deletion of the recorded shows cannot be changed, so watch your shows before they get deleted permanently from the recorded videos section.
There is a backup plan for those who are forgetful and forgot to record the upcoming show in advance. Chill out, you can still watch them. Philo TV comes with the rewind option that lets you watch anything aired in the past three days.
Do rewind, pause, or fast forward of your recorded and on-demand shows whenever you want.
So, with the aforesaid steps, I hope you now understand How To Record On Philo. and now you need to know the steps to watch the recorded shows and delete them(if you want) as I already mentioned you have unlimited DVR space on Philo.
How To Watch Or Delete Recorded Shows On Philo TV
After recording, episodes of the shows will be available in the saved library. There is a Saved option right on the home page of the Philo TV. Just click on it and select your show to watch them.
The videos you have saved have the DVR tag on them, you can watch them within 30 days from the date of their recording.
You need not worry about deleting the recorded shows because Philo offers unlimited storage options to record as much as videos, and also it automatically deletes in the next 30 days. So, why even bother to delete if Philo is doing it for you from the oldest to newest.
But make sure to watch your recorded show within 30 days otherwise, you have to record it again.
Just watch your recorded shows, and record many more and finish them on time. Philo will take care of them after 30 days.
As I have already mentioned that you only get 20 hours of recording space, which is quite small if you are a heavy binger and watch so many shows.
But, it is much for one season or two of your favorite show, to get recorded at a time.
With the features of fast-forwarding and rewind, you can watch your shows more efficiently.
Wrapping Up:
With the above-mentioned detailed guide, I hope you now understood How To Record Shows On Philo TV. With these easy methods, you know How To Watch Or Delete Recorded Shows On Philo TV and How To Record Upcoming(Future) Shows On Philo TV.
You can use this method of recording shows on Philo on your respective devices like Firestick, Roku, etc. Philo TV works fine on all.
Follow these methods, and let us know in the comment section below. If you have some other queries regarding Philo TV let us know.
Must Read:
Share your favorite shows with us or suggestions of shows.
Also, do share this article on social media with your friends and family too.
Zayn Shaikh is a tech analyst at SortingTech.com, where he focuses on streaming, technology, and the latest methods and tricks for cord-cutting. With a Bachelor’s degree in Computer Engineering and 4 years of industry experience, Zayn is dedicated to simplifying complex tech trends and providing actionable insights. His expertise covers a broad range of topics, from emerging technologies to practical tips for enhancing your digital life. For up-to-date tech advice and facts, connect with Zayn on Instagram.
The post How To Record Shows On Philo TV (Recent And Upcoming) appeared first on Sorting Tech.
]]>The post How To Cancel Vimeo Subscription [Apple, Roku, Amazon, Android] appeared first on Sorting Tech.
]]>The refund policy of Vimeo is strict a bit, you must act accordingly to get the refund.
There is a specified period, beyond which any user who wishes to cancel, won’t get any refund.
Specified period to get the refund is the same for all the plans, whether you have subscribed for Plus, Pro, Business, or Premium it doesn’t make any difference.
- Yearly Subscription:- Cancel within 30 days of purchase, to get a refund.
- Monthly Subscription:- Cancel within 5 days of purchase, to get a refund.
So, make sure of the specified time period, if you wish to cancel, and if you have already opted for the free trial then you know exactly if you wish to cancel the subscription or not.
However, your video access will remain until the next billing cycle.
More On Vimeo:-
For the premium plan only, I think you have to be sure of the time period because there is no free trial for that. Even for free trial make sure to cancel within 30 days, otherwise, you will be charged.
ATTENTION ALL!!!
Do You Know these facts about the potential dangers of streaming online : 1. The risk of your IP revelation. 2. Your ISP has all your browsing data and it is now legal to sell this type of information to third parties. The only way to protect your viewing and identity in the 3 above scenarios is by using a VPN. Check out these most popular VPNs that will help you with this:- a) Express VPN b) Ivacy VPN
Steps to cancel for a paid subscription or free trial will be the same. So just follow the steps provided here.
The steps vary as per the device you are using for Vimeo, so the method to Cancel Vimeo Subscription will also be a bit different. Methods for all the devices are listed in this article.

Select from the following methods, as per the device you are using for Vimeo.
Cancel Vimeo From Website
- Open Vimeo on your browser and log in with your credentials.
- Now, click on the Profile icon on the top right corner of the screen and then select Manage Subscription from there.
- There will be two options, Pause Subscription or Cancel Subscription.
[NOTE:- If you select Pause Subscription, you will then be charged at the end of the current billing cycle.]
- Finally, confirm the choice to cancel, and that’s it.
Cancel From Android Application
- Visit Google Play, and sign in with your account with which you have signed in on Vimeo.
- Click on Manage Subscription on the left sidebar.
- Select Manage> Cancel Susbcription.
- Confirm the cancellation and you are done.
Cancel Using Roku
If you have signed up on Vimeo using the Roku channel, you can cancel it from the streaming device or from the website.
- Press the Home button on your Roku remote.
- Locate and access options for a subscription channel:-
From Channel Lineup
- Select Home.
- Use the arrow buttons on your remote to highlight a subscription channel.
- Press the Star button on your remote.
From Channel Store
- Scroll down and select Streaming Channels.
- Browse a category or genre, or search for a subscription channel.
- Press the OK button on your remote.
- Once you access options, select Manage subscription and to unsubscribe select Cancel subscription and confirm the selection.
You may also visit the official Roku website, sign in to your account, select Manage Your Subscription, and select Unsubscribe from there.
Cancel Option For Amazon Users
- Visit Amazon and log in, then go to .
- Select Your Apps under Digital content and devices.
- Select Your Subscriptions under Manage.
- Update your subscription as needed.
Cancel Vimeo From Apple Devices
If you have Apple devices like iPhone, Mac, or Apple Watch, you can easily manage any subscriptions from there itself. You just need to reach a Subscription option. From there, select the service you want to unsubscribe(Vimeo in this case) and just carry on with it.
For device-specific methods, you may click here. There you will get to know to manage your subscription on different Apple devices.
The end result is cancellation of subscription but there is a little change in the way for different Apple devices.
When you cancel from any of the above-mentioned devices, you will receive an email confirmation.
If you did not receive a confirmation, double-check that your subscription shows as ‘Canceled’ in your settings.
Now, I think you have all the possible ways to Cancel Vimeo Subscription, but still, if you face any trouble or you have any other method to do it, please mention it in the comment section below.
Also Read:-
Share this article with others too, on social media to help out anyone looking to cancel the Vimeo services.
Zayn Shaikh is a tech analyst at SortingTech.com, where he focuses on streaming, technology, and the latest methods and tricks for cord-cutting. With a Bachelor’s degree in Computer Engineering and 4 years of industry experience, Zayn is dedicated to simplifying complex tech trends and providing actionable insights. His expertise covers a broad range of topics, from emerging technologies to practical tips for enhancing your digital life. For up-to-date tech advice and facts, connect with Zayn on Instagram.
The post How To Cancel Vimeo Subscription [Apple, Roku, Amazon, Android] appeared first on Sorting Tech.
]]>The post How To Connect Roku To TV With Cable Box [Simple Steps] appeared first on Sorting Tech.
]]>The main factors are your TV(number of HDMI ports in it) and the type of Roku device you are using.
There may be cases where your TV has only HDMI port, but the cable box you are using has component cables for the connection.
In such case you already have the HDMI port you are looking for, so no issues then.
But, if the cable box uses the single available HDMI port on a TV, then buying an HDMI component adapter is your only option, only if your TV has component (red, white, and yellow) ports.

Having this HDMI component adapter, you can use this on the TV which has no HDMI port at all as well, just by using the component ports(red, white, and yellow).
You just need to follow the steps, as per your situation, like the type of Roku device you are using(Roku stick or Roku Player), number of HDMI ports on the TV.
Most TVs have at least one HDMI port.
Once you have figured out your condition and terms, then begin with this article for the further connection.
So, let’s begin with the connection methods.
[NOTE:- If you have Roku Stick and your TV has no HDMI port at all, you will not be able to use it even after you own the HDMI component adapter, you can only use Roku Player then.]
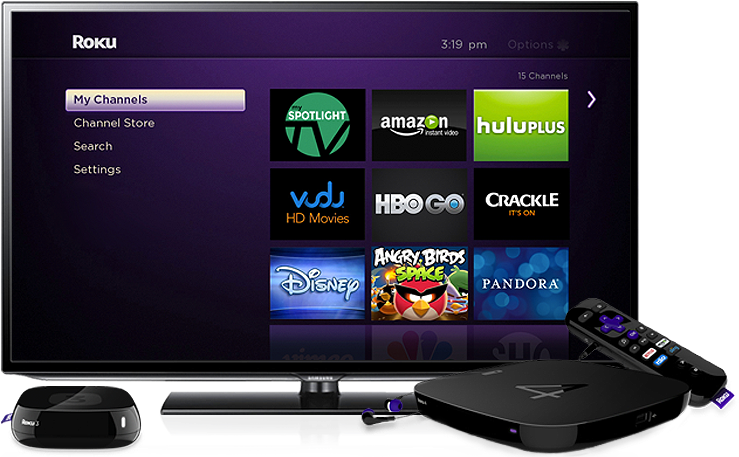
- Roku Player — A small box, comes along with several cables.
- Roku Stick — Looks like a flash drive. Comes with at least one power cable.
If you have Roku Player, then plug one end of the HDMI cable on its back and the other end on the HDMI port of your TV.

If your TV has no HDMI port and you own HDMI component adapter, as mentioned earlier in the article.
Then, put the component cables in the component ports of TV(red, white, and yellow cables in respective color ports) and the other end of the adapter at the back of your Roku Player.
[NOTE:- If your CableBox uses the component cables(red, white, and Yellow) and your TV has no HDMI port then, you cannot use any streaming device on your TV.]
Now, if you own Roku Stick, then plug the HDMI connector at the back of the stick and then, plug the Roku stick on the HDMI port of your TV.
For any Roku device, keep in mind the port number in which you have plugged the Roku device.
I mean, if your TV has, more than one HDMI ports(HDMI1, HDMI2), then make sure of the port number.
After all this, now you have to connect your Roku device to a power source.
The power adapter comes along with the device you just need to connect one end to your Roku device and the other end into a nearby socket(electrical outlet).
ATTENTION ALL!!!
Do You Know these facts about the potential dangers of streaming online : 1. The risk of your IP revelation. 2. Your ISP has all your browsing data and it is now legal to sell this type of information to third parties. The only way to protect your viewing and identity in the 3 above scenarios is by using a VPN. Check out these most popular VPNs that will help you with this:- a) Express VPN b) Ivacy VPN
In the case of the Roku stick, it may have a USB power stick, and if your TV has a USB port that is not in use you can plug the USB power cable to your TVs USB port.
And, if no USB port is available, just connect the other end with any nearby socket(electrical outlet).
Power ON TV and device, then using TV remote select HDMI as the source on which the Roku is connected.
To do this, you need to press any of the available buttons for source selection(Input, Video, or Source).
Well, now the Roku’s setup screen is available on your TV screen, so you can begin setting up Roku now.
How To Setup Roku On TV
After all the earlier steps, now Roku is running on your TV. So, follow the following steps to set it up.
- Use the Roku remote and select your preferred language for the Roku device.
- Now, for the internet select Scan again to see all networks from remote and select your Wi-Fi from it. In the case of the Roku player, you can directly attach an Ethernet cable(LAN cable) to the layer also.
- Update to the latest version, if asked for better performance.
- Now, you need to set up the screen resolution, which you can also do any time by going to Settings>Display Type.
- If you have a Roku player, it will automatically select the best resolution as per your TV.
- But in the case of Roku sticks you have to select Set Display Type or Auto Detect Display Type.
- In the next step, you can select your Roku remote to control your TV if you like.
- Just select Check Remote Settings, when asked and follow all the steps, or skip directly to the next step.
- Now, wait for the activation code to appear, once it is available on-screen, from your PC or smartphone visit:- Roku Activation Link.
- Enter the code flashing on the screen of your TV there and hit Submit.
That is all.
If you already have a Roku account, log in, or just create a new by following the on-screen steps. Once done, you will be able to enjoy Roku right away.
Wrapping it up:-
Well, I hope your queries regarding How To Connect Roku To TV With Cable Box are resolved now. If not, let me know in the comment section below.
You can also suggest any other methods or ways to do it if I missed any here.
Must Read:-
Share this article, with others too on social media as much you can as we all know ‘Sharing Is Caring‘.
Zayn Shaikh is a tech analyst at SortingTech.com, where he focuses on streaming, technology, and the latest methods and tricks for cord-cutting. With a Bachelor’s degree in Computer Engineering and 4 years of industry experience, Zayn is dedicated to simplifying complex tech trends and providing actionable insights. His expertise covers a broad range of topics, from emerging technologies to practical tips for enhancing your digital life. For up-to-date tech advice and facts, connect with Zayn on Instagram.
The post How To Connect Roku To TV With Cable Box [Simple Steps] appeared first on Sorting Tech.
]]>The post How To Connect AirPods To Roku TV [Simple Steps] appeared first on Sorting Tech.
]]>Not only Apple’s AirPod, but we can also easily connect any headphones to the Roku device too.
Connecting an AirPod to Roku TV is much easier than to connect it to Apple TV.
For this feature to work, you need to install the latest Roku iOS app on your iPhone, which is a prerequisite for this.
After this, the connection of your AirPod to Roku TV is just one tap away.
Yes, that’s right you can easily connect or disconnect your AirPod, just by a single tap on the Roku iOS app.
Not only Airpod, but you can also connect any other earphone/headphone to your Roku.
ATTENTION ALL!!!
Do You Know these facts about the potential dangers of streaming online : 1. The risk of your IP revelation. 2. Your ISP has all your browsing data and it is now legal to sell this type of information to third parties. The only way to protect your viewing and identity in the 3 above scenarios is by using a VPN. Check out these most popular VPNs that will help you with this:- a) Express VPN b) Ivacy VPN
This is discussed later in this article, so just go through this.
Once you download and install the Roku app on your iPhone, make sure that your iPhone or iPad is connected with the same WiFi(wireless network) as your Roku device.
This is very important for this feature to work efficiently.
After this, connect your AirPod to your iPhone or iPad and then launch the Roku app on your Apple device.

In this app to turn ON the feature which is known as Private Listening, you need to tap on the Headphone icon.
By doing this, you can easily use AirPods with Roku TV.
To disconnect tap again on the same headphone icon. As you can see in the image.
[NOTE:- To listen to live television with this feature, you need to connect your Roku to aerial.]
If you own other headphones and want to connect headphones to Roku TV then there is a way using Roku remote.
Yes, as you know there is 3.5 mm jack available on Roku remote.
You just need to plug in your wired headphone’s AUX cable in the audio jack of the Roku remote.

So, now either you own wired headphones or wireless like Airpod or any other wireless headphone, you can easily connect it with the Roku TV.
Using this private listening feature is quite easy and interesting, what do you think about it?
Let me know in the comment section.
If you face any issue doing that, please let me know in the comment section below.
Must Read:-
Also, do let me know if you have any suggestions, and share this article with others on social media.
Zayn Shaikh is a tech analyst at SortingTech.com, where he focuses on streaming, technology, and the latest methods and tricks for cord-cutting. With a Bachelor’s degree in Computer Engineering and 4 years of industry experience, Zayn is dedicated to simplifying complex tech trends and providing actionable insights. His expertise covers a broad range of topics, from emerging technologies to practical tips for enhancing your digital life. For up-to-date tech advice and facts, connect with Zayn on Instagram.
The post How To Connect AirPods To Roku TV [Simple Steps] appeared first on Sorting Tech.
]]>The post How To Play Apple Music On Roku [Step-By-Step Guide] appeared first on Sorting Tech.
]]>However, Apple Music or iTunes is not officially available for Roku.
But, still there are ways to play and enjoy apple music on Roku.
To make this happen you need to use a third-party application called Apple Music Converter either from your Windows device or Mac.
This is important as on Roku you can play music of some selected formats only.
This Converter will help you convert the Music into the required format, and then you can play it on Roku.
You must be thinking about using this converter application, as is Apple Music Converter legal?
So, the answer is YES, it is legal. Make sure you use some popular ones, as most of the converters are not trying to break DRM(Digital Rights Management) protection.
Media File Formats Roku Supports
![]()
Songs in Apple Music in Apple Fairplay protected, which is not supported by Roku. It is not as simple as streaming an MP3 file on Roku, and you cannot use the ‘Play On Roku’ app on your iPhone to stream Apple Music on Roku.
ATTENTION ALL!!!
Do You Know these facts about the potential dangers of streaming online : 1. The risk of your IP revelation. 2. Your ISP has all your browsing data and it is now legal to sell this type of information to third parties. The only way to protect your viewing and identity in the 3 above scenarios is by using a VPN. Check out these most popular VPNs that will help you with this:- a) Express VPN b) Ivacy VPN
So, you must convert it in the supported formats first, which are:-
- MUSIC- AAC, MP3, WMA, FLAC(firmware 5.3+), WAV(firmware 5.3+)
- VIDEO- MKV(H.264), MP4(H.264), MOV(H.264), WMV(VC-1, firmware 3.1 only)
- IMAGE- JPG, PNG, GIF(non-animated)
So, apart from these formats, you can not use any other formats. Make sure you convert your music files to these formats only when using Apple Music Converter.

As now you are familiar with the supported formats of Roku, you need to download the Apple Music Converter first to do it.
There will be two options, one is the free version and the paid one, decide for yourself and download one.
The main advantage of using this application, as it does not changes the audio quality of the music and keeps the ID3 tags after the conversion.
After you download this converter application, install and run it on your device.
Also, make sure that you have downloaded the Apple Music files you want to convert and that they are working fine on iTunes.
Now, follow the steps given below to convert Apple Music to Roku audio formats:-
- Run the converter application and then click the “+” sign to add Apple Music tracks or audio files from iTunes which you want to convert.
- Tap on the mechanical gear icon(Settings), and select MP3(or any other Roku supported formats) as output format. You can also change the converting speed and output quality too from there.
- Now, click on Convert to start conversion, once done you can find the new files in the Converted tab.
Now, you just simply copy these converted new audio files to any flash drive, and to play Apple Music on Roku connect the flash drive with it.
You can use any media player like Roku Media Player or Plex, etc to play the music on the Roku device.
For Plex, you can download the Plex Media Server program for your computer, and follow the instructions to sync media files.
Then link your account by entering a code and now you can listen to the music from your computer on Roku.
Wrapping it up:-
Well, with the above-mentioned steps on How To Play Apple Music On Roku, I hope you will be able to do it now. In case you face any issue, let me know in the comment section below.
Please add your suggestions or steps if I missed here too in the comment section.
Must Read:-
Also, do share this article with your friends and family to help them with this, as we all know that ‘Sharing Is Caring’.
Zayn Shaikh is a tech analyst at SortingTech.com, where he focuses on streaming, technology, and the latest methods and tricks for cord-cutting. With a Bachelor’s degree in Computer Engineering and 4 years of industry experience, Zayn is dedicated to simplifying complex tech trends and providing actionable insights. His expertise covers a broad range of topics, from emerging technologies to practical tips for enhancing your digital life. For up-to-date tech advice and facts, connect with Zayn on Instagram.
The post How To Play Apple Music On Roku [Step-By-Step Guide] appeared first on Sorting Tech.
]]>The post How To Cancel Britbox Subscription [Methods For All Devices] appeared first on Sorting Tech.
]]>You are here already, it means that you are aware of Britbox and also have enjoyed Britbox on TV too, which is quite an experience.
To manage your subscription, you must aware of the device you are using to watch Britbox, I mean the cancellation step varies.
Here, in this article, you will get to know every possible step to cancel Britbox. So, just read the full article.
Before cancellation, tell me one thing have you tried some very popular mystery shows and movies on Britbox?
If not, give it a try once.
If you have opted for the free trial, you must cancel your subscription before your next billing date. Otherwise, you will be charged with the subscription fee.
Few basic ways which involve contacting the support team by a call or email can also help you in this cancellation.
You just need to provide your information to the support team and request the cancellation.
If you are residents of the US and Canada, call on – 877-858-3559 and explain everything or visit the request page, fill out the form and submit.
UK residents can call on – 03301232448 or email to support team on- help@britbox.co.uk, or reach out to – britbox.co.uk/help.
The support team will surely help you with cancellation.
But, there is one thing, this method takes time, you need to wait on call and for the reply on email.
If you are OK with the waiting, it’s alright or you can move ahead to the next section.

Britbox is compatible with many devices, and there are only a few on which you can cancel the subscription. But at first, if you have subscribed directly from the Britbox using your credit card, follow the below steps on any browser using PC or mobile.
- Log in to your BritBox account, and go to your Account (click your name in the top right).
- Now, click on Account details.
- Then, click the Subscription option.
- At last click Cancel Subscription in the Your Plan area.
But, if you have subscribed and paid directly from any other source like Roku, Apple ID, or Google Play account, then this method won’t work for you.
You have to cancel directly from that respective source.
Cancel On Roku
Using your Roku device, follow the below steps to cancel the Britbox subscription.
- Press the Home button on your Roku remote.
- Select Home from there.
- Now using the arrow buttons on your remote highlight the Britbox channel.
- Then press the Star button on your remote.
- Select Manage subscription to view the renewal date and access additional options.
- Select Cancel subscription. to unsubscribe.
- Confirm by choosing to remove the channel immediately or you can keep it for the remainder of the subscription.
You can also cancel from the web, just visit – my.roku.com, and sign in to your Roku account if asked.
Now, click on Manage Subscriptions, and select Unsubscribe in front of Britbox to cancel the subscription.
Cancel Britbox With Apple Devices
If you have paid and subscribed directly using your Apple ID, follow the below steps. This can work on your iPhone, iPad, etc.
- Open the Settings app.
- Tap your name.
- Tap Subscriptions or iTunes & App Store and then tap your Apple ID> View Apple ID>sign in, and scroll down to Subscriptions, and tap it.
- Now, tap on Cancel Subscription in front of Britbox.
ATTENTION ALL!!!
Do You Know these facts about the potential dangers of streaming online : 1. The risk of your IP revelation. 2. Your ISP has all your browsing data and it is now legal to sell this type of information to third parties. The only way to protect your viewing and identity in the 3 above scenarios is by using a VPN. Check out these most popular VPNs that will help you with this:- a) Express VPN b) Ivacy VPN
If you have subscribed for Britbox via Apple TV channels, you need to follow the following steps:-
- Open Settings on Apple TV account either from the device you are using or signing in from the computer.
- Select Users & Accounts, then select your account.
- Then select Subscriptions.
- Choose the Britbox subscription, then select Cancel Subscription.
Cancel On Google Play
For those who have subscribed for Britbox, directly from their Google Play account, you need to follow the following steps to cancel the service.
- Using your Android phone or tablet, open the Google Play Store.
- Check if you’re signed in to the correct Google Account which you have used for the subscription of Britbox(otherwise it will not appear in your subscription list of that account).
- Tap Menu and then Subscriptions.
- Select the Britbox from there.
- Tap Cancel subscription.
Cancel Britbox On Amazon
In the case of Amazon, if you have subscribed for Britbox as a separate channel to watch it on your Fire TV/Firestick, then follow the below steps. This method is different as there is also one way of unsubscribing Britbox directly from the Amazon Prime Video channels list.
- Go to Your Memberships and Subscriptions.
- Select Manage Subscription next to Britbox.
- Click the link under Advance Controls to be directed to the main subscription page.
- From this page, you can end your subscription.
Now, to cancel Britbox from Prime Video channels, follow the below steps:-
- Go to .
- Under Prime Video Channels, find Britbox.
- Select Cancel Channel and confirm.
That’s all, you are done.
Winding up:-
Well, you are all set to move ahead with the cancellation, and let me know in the comment section below, in case you face any issue doing this.
I hope I have given all the possible ways for your query How To Cancel Britbox, but if you have any other suggestions please comment it down.
Must Read:-
Share your experience with Britbox here, and the reason for your cancellation.
Do not forget to share this article on social media platforms.
Zayn Shaikh is a tech analyst at SortingTech.com, where he focuses on streaming, technology, and the latest methods and tricks for cord-cutting. With a Bachelor’s degree in Computer Engineering and 4 years of industry experience, Zayn is dedicated to simplifying complex tech trends and providing actionable insights. His expertise covers a broad range of topics, from emerging technologies to practical tips for enhancing your digital life. For up-to-date tech advice and facts, connect with Zayn on Instagram.
The post How To Cancel Britbox Subscription [Methods For All Devices] appeared first on Sorting Tech.
]]>The post How To Watch Frndly TV On Smart TV (All Methods) appeared first on Sorting Tech.
]]>Here, in this article, you will find every detail about Frndly TV, which you must know before actually going for the service.
First of all, you must go for its trial, which s 7 days of the free trial, which is really good. So, you decide only after using it for one week.
If it worths it, then go for it or just unsubscribe it anytime you want.
Also Read:-
You need to provide your Credit/Debit card details or PayPal to avail of this free trial.
Frndly TV also offers the DVR feature, which is really interesting, as you can record as many contents you want and watch it later as per your timing.
These features actually, what makes the services more demanding, because everyone wants some extra and important feature like these for the money they spend.
LIVE TV that Frndly TV offers, is also nice, you will get 15 channels to watch.
However, you don’t get many channels but there are some niche channels that you won’t get on other streaming services.
The list of channels is in the images below.

Having these channels plus On Demand could be a good alternative for your cable TV.
Frndly TV Compatible Devices
You need not worry, as Frndly TV is available on every popular streaming devices, so you can enjoy your content without any problem.
The list of compatible devices are as follows:-
- Android and iOS:- Smartphones, Tablets, iPad, and iPhone
- Apple TV
- Amazon Fire TV
- Chromecast
- Roku
With the help of these devices, you can easily watch Frndly TV on a smart TV.
Frndly TV Plans And Pricing
It has three plans, which are shown in the image below.

For the basic plan, you will not get the DVR feature and you can only stream on a single device at a time.
You can forward or rewind your content anytime with this DVR feature. Frndly Tv offers unlimited storage for recording so that you need to delete other recordings in order to record new ones.
If DVR not matters much for you, you can choose this basic plan.
Also Read:-
Also, Frndly TV recommends an internet speed connection of 5 Mbps for HD quality contents and 1.5 Mbps for SD quality. The prerequisite of any streaming service is a good internet connection.
As it is compatible with many streaming devices, so it will have different methods also to watch Frndly TV on a smart TV.
How To Watch Frndly TV On Apple TV
Frndly TV app is available on every Gen 4 and newer Apple TV.
- Press the Home button Apple TV remote, and open App Store.
- Now, search for Frndly TV and select it for download.
- Follow every step till installation and you are done.
If you have already subscribed for it, enter the account information to log in and start streaming, or you can directly subscribe from your TV.
Watch Frndly TV Using Amazon Fire TV

First, you need to add the Frndly Tv app on Fire TV, which can be done from the TV directly or using a computer too. You will know How To Download Frndly TV on Firestick.
From your laptop/PC, go to Amazon-Frndly TV App and Sign in if required.
- From there, select your Fire TV device of yours and select Deliver.
- Wait for the download to get completed, and then sign in on your Fire TV.
You will find the app directly on your TV, sign in to your Frndly TV account. A free trial or subscription is required to watch the content.
Also, you can use the following steps, directly from your TV.
- Press the Home button from the Amazon Fire TV remote and search for Frndly TV.
- Now, select Get.
- Wait for the download to be completed, sign in to your account, and enjoy.
These methods can also be used for Firestick, you just need to search and download the app.
How To Watch Frndly TV On Roku
Here too, you can use either your laptop/PC or Roku device directly to download the Frndly TV app.
From your computer visit Roku-Frndly TV App and log in to your Roku account. Then select Add Channel and wait for the download to complete.
Now, sign in to your Frndly TV account to access the content you have subscribed for.
Or you can use your Roku device directly, steps are the following:-
- Press Home on Roku remote and scroll down to select Streaming Channels.
- Scroll down and select Search Channels and search for Frndly TV.
- Wait for the download to complete, once done sign in to your Frndly TV account to enjoy the content.
Now, if you want to cast Frndly TV on your smart TV, then move to the next methods.
How To Cast Frndly TV On TV

As Frndly TV is compatible with Chromecast too, you can cast your device on your TV. Many smart TVs these days come with an inbuilt cast option too.
For Android Devices
So, you can either use Chromecast or directly use any app to cast or even HDMI cables to watch on TV.
Like, if you are using a laptop/PC, you can connect HDMI cable from it to your TV and then from remote select HDMI as output.
This is the most convenient way to cast your device on your tv right away.
But, to cast your mobile or tablet screens on TV, you can either use Chromecast or the app.
If you are using Chromecast then follow the methods listed below.
- Plugin the Chromecast on your TV and also connect the power adapter to your Chromecast.
- Open Frndly Tv app on mobile or tablet and log into your account.
- Now, click on the Chromecast icon in the upper right-hand corner.
Also, you can use Google chrome to cast on TV, for which Windows 10 is necessary.

- Connect TV and Windows 10 laptop/PC with the same WiFi network.
- Open Chrome, and click on the three-dot menu on the top right side, and look for the cast option.
- Click on the cast and you will see the list of available Chromecast devices, choose yours.
- There are three cast options, you can choose between them as per your need by clicking on the Sources option.
Cast Tab:- With this you can cast only a particular tab tour TV, it is by-default available.
Cast Desktop:- You can cast your entire display of laptop/PC screen with this option.
And, Cast File:- In cast file mode you can stream video or audio file. You have to select the file which you want to play on your TV screen.
ATTENTION ALL!!!
Do You Know these facts about the potential dangers of streaming online : 1. The risk of your IP revelation. 2. Your ISP has all your browsing data and it is now legal to sell this type of information to third parties. The only way to protect your viewing and identity in the 3 above scenarios is by using a VPN. Check out these most popular VPNs that will help you with this:- a) Express VPN b) Ivacy VPN
Make sure your device and TV both are connected with the same WiFi network.
- To cast using the app, use the inbuilt cast app of your TV, and then open your Frndly TV app on your device and then tap on the cast.
For Apple Devices
Also, if you have Apple devices, then also you can cast your screen on your TV using Airplay 2 or Homekit. To do this follow the below steps.
- Open Settings of TV and look out for QR code for Apple Homekit.
- Now, on your Apple device(iPhone, iPad, Mac, etc.) open the Home app and tap on the ‘+‘ icon and then Add An Accessory.
- Now, scan the flashing QR code on your TV screen with your Apple device, also add an accessory to the network, and tap on Allow, if asked.
- Name the device, and tap Done, the accessory is now successfully added to your Homekit app.
You can now cast any video from your Apple device to your Smart TV.
[NOTE:- This app may not work in your region, so please use any VPN and select the US region to watch Frndly TV.]
This way you will be able to stream Frndly TV on your TV.
Wrapping it up:-
I hope you have found this article How To Watch Frndly TV On Smart TV useful, and now will be able to watch Frndly Tv on your TV.
However, if you face any problem in doing so, please let me know in the comment section below.
You May Also Like:-
Also, if you have any suggestions regarding this article, please share them with me in the comment section.
Also, do share this article with your friends and family, and help them out too.
Zayn Shaikh is a tech analyst at SortingTech.com, where he focuses on streaming, technology, and the latest methods and tricks for cord-cutting. With a Bachelor’s degree in Computer Engineering and 4 years of industry experience, Zayn is dedicated to simplifying complex tech trends and providing actionable insights. His expertise covers a broad range of topics, from emerging technologies to practical tips for enhancing your digital life. For up-to-date tech advice and facts, connect with Zayn on Instagram.
The post How To Watch Frndly TV On Smart TV (All Methods) appeared first on Sorting Tech.
]]>The post How To Sign Up For Acorn TV [Through All Platforms] appeared first on Sorting Tech.
]]>A subscription-based streaming service ‘Acorn TV’ will cost you around $5.99 for a month and $59.9 for its annual subscription.
The most common way to sign up for the Acorn TV subscription is to visit its official website. After that, hit on Sign Up and provide some of the information asked, and create a password for your account.
That is all, you will get 7 days of free trial and it will cost you the whole amount of subscription fee at the end of your trial period.
Following are the list of compatible devices for Acorn TV:-
- Android TVs/Smart TVs
- Google Chromecast
- Roku
- Amazon FireStick/Fire TV
- Apple TV
- Android and iOS-based smartphones or tablets
You can watch your favorite contents of Acorn TV on any of the above devices, these devices(apart from the TV itself) will let you watch Acorn TV on your TV.
So, you may also use these devices and services to sign up for Acorn TV directly from its interface, and once you do that you will rely on these platforms itself to manage your Acorn TV subscriptions.
It means that, if in the future you wish to cancel Acorn TV subscription you will have to use your respective platform for that.
Now move ahead to the next section, if you are looking for ways to sign up for Acorn TV using other third-party platforms.

Using Google Play
If you have some google play balance and are willing to subscribe for Acorn TV directly through Google Play, as you may have to download its application from that and it will be a lot easier to directly subscribe to it too.
Follow the below-mentioned steps to do that:-
- Open the Google Play Store app on your smartphone or visit play.google.com from your computer.
- Find and open the Acorn TV.
- Tap Subscribe.
- Choose a subscription option. You will also get the benefit of 7 days of free trial too.
- Select a payment method.
- Tap Subscribe.
This method may also be used to sign up for Acorn TV on Android TV, you just have to open the Play Store on your TV and follow all the steps as mentioned above.
Sign Up For Acorn TV On Amazon Prime And Fire TV
If you own Amazon Fire TV/Firestick you do not need to have the Amazon Prime subscription, these two are very different.
You can download the Acorn TV app on your Fire TV or press Home on your remote. Then select Apps and search for Acorn TV. By both ways, app can be run on your Fire TV.
For this, you do not need Amazon Prime subscription, just simply download the app on your device.
Now, the Amazon add-on subscription is totally separate from a standard Acorn TV subscription and is exclusive to Prime members only.
Acorn TV will cost you $4.99 for a month and $49.9 for a year if you subscribe through Amazon Prime(this cost is apart from the Amazon Prime Video subscription itself).
ATTENTION ALL!!!
Do You Know these facts about the potential dangers of streaming online : 1. The risk of your IP revelation. 2. Your ISP has all your browsing data and it is now legal to sell this type of information to third parties. The only way to protect your viewing and identity in the 3 above scenarios is by using a VPN. Check out these most popular VPNs that will help you with this:- a) Express VPN b) Ivacy VPN
To sign up for Acorn TV on Amazon Prime follow the below steps:-
- Open Amazon on a web browser.
- Login to your account and click on Account & Lists next to the search bar.
- From that dropdown menu, select the Your Prime Video option.
- On the new page select Channels, and click on the see more options next to Prime Video Channels.
- Look for Acorn TV and open it. You will get the option to start the free trial, select it, and follow all the on-screen instructions and sign up for Acorn TV.
Billing information and trial period information will be shared with you, so keep an eye on it if you are only for the free trial.
Sign Up Acorn TV With Roku
- Press the Home button on your Roku remote.
- Scroll up or down and select Streaming Channels to open the Channel Store.
- Search for Acorn TV using the search bar in the channel store.
- Then you can select Buy or Start the free trial in order to purchase and install the channel.
- If you have a Roku account PIN, then you will be required to enter it.
After this, you are done, and now you are all signed up for Acorn TV.
Sign Up With iTunes
iTunes can be used as a mode of payment for many of the services on the iOS platform, so you can also subscribe/sign up for Acorn TV as one of the Apple TV channels with iTunes.
To do this follow the below mentioned steps:-
- Open Apple TV app on your device(iPhone, iPad, Apple TV, smart TV) and then select the Watch Now option at the top or bottom of the screen depending upon the device you are using.
- Now, either scroll down to the Apple TV channels list or search for the Acorn TV.
- There start your free trial of Acorn TV and at the end of the trial period, your Apple ID will be charged with the subscription fees(You must sign in with your Apple ID).
The difference between the signed up accounts through third-party platforms and the official one is when you reach to the billing information page of Acorn TV, you will notice a small note there clearly indicating subscribed through Amazon Fire TV, Roku or iTunes etc.
That is how you can tell the difference and at the time of cancellation, make sure which platform to headout for the next steps.
As of now I hope you now understand these steps for How To Sign Up For Acorn TV, as per your respective platforms.
Now, in case of any issue or query, please feel free to mention it in the comment section below.
Also, feel free to add your suggestions in the comment section also.
Must Read:-
Also, do not forget to share this article with others too on social media platforms.
Zayn Shaikh is a tech analyst at SortingTech.com, where he focuses on streaming, technology, and the latest methods and tricks for cord-cutting. With a Bachelor’s degree in Computer Engineering and 4 years of industry experience, Zayn is dedicated to simplifying complex tech trends and providing actionable insights. His expertise covers a broad range of topics, from emerging technologies to practical tips for enhancing your digital life. For up-to-date tech advice and facts, connect with Zayn on Instagram.
The post How To Sign Up For Acorn TV [Through All Platforms] appeared first on Sorting Tech.
]]>